Gather ye apples

101613FAT3-124

Two weeks ago torrential rains drowned what remained of our veggie garden, and our lone apple tumbled from the tree before ripening. Yay for local farms! A short drive out of the city and we are surrounded by an abundance of fresh fruits and veggies. And look! A large box of Golden Delicious apples from my sister-in-law.

92911-122

We’ve been busy with home improvements and fall cleaning projects …  painting, grout cleaning, gutter and roof cleaning and repairs, tree trimming. The next big project begins later this week when we demolish our kitchen for a few upgrades, new countertops, faucet, and replacement of a crumbling cast iron sink. After we recover from that, a mudroom redo will begin. I’ll definitely miss my kitchen during the next few weeks, but I’m so looking forward to giving it a fabulous housewarming, with homemade fall and winter foods, when it’s done.

In the meantime, I need to do something with all these apples.

Visions of apple tarts were dancing in my head. I began searching through my recipes, but only came up with one even though there’s photographic evidence of others. Two criteria were in order: easy and tasty. Google found a recipe at Smitten Kitchen that sounded like a winner.

101513FAT-100

The dough: I used my go-to tart dough recipe from Ina Garten, and the combination freeform/tart pan technique from Chez Panisse’s Executive Chef and owner, Alice Waters (through Smitten Kitchen). I like the way the sides are fluted, but the top of the dough wraps the apple wedges protectively into its folds.

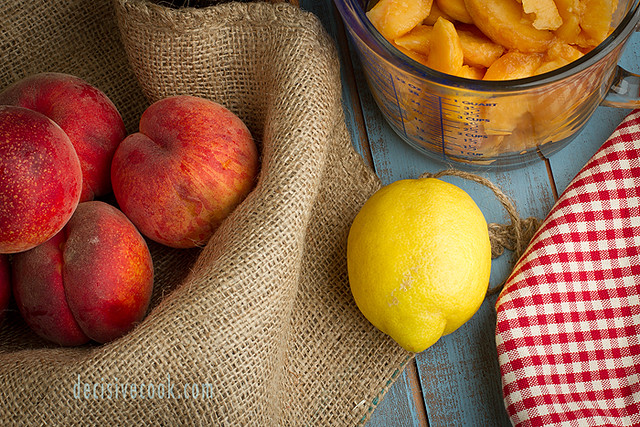
Gather up 6-8 apples. I used Golden Delicious for this because that’s what I currently have the most of, but Gravenstein or Granny Smith’s would also be great choices. Slice the apples in half and remove the core and peeling.

101513FAT-114

91012AP-131

Place the halves face down and slice into strips. Hold the sliced halves together and place them into the pastry. Save the cores and peeling you’ve removed for a glaze to be applied after baking.

101513FAT-116

Fold up the edges of the dough and brush the entire top surface with 2 Tablespoons of melted butter. Sprinkle 2 Tablespoons of the sugar on the dough and the other 3 Tablespoons on the apples. Toss a teaspoon of cinnamon onto the apples as well. Because there’s nothing better than the smell of apples and cinnamon baking together. And finally, dot another Tablespoon of butter on top.

101513FAT-125

Bake in a preheated 400°F. oven (on a pizza stone if you have it) for 45 minutes. Turn the tart every 15 minutes so it browns evenly.

101513FAT2-101

I love the way this crust turned out! Freeform, but structured enough to hold up in a hot oven.

101513FAT2-107

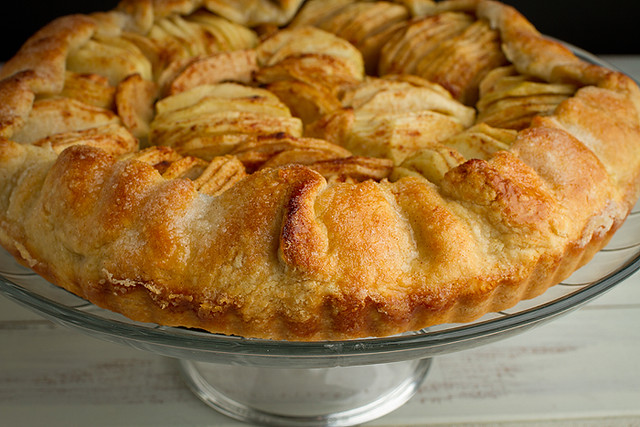
Serve with a scoop or two of vanilla ice cream.

101513FAT2-129

French Apple Tart

Pastry (Ina Garten’s recipe)
2 cups all-purpose flour
1/2 teaspoon kosher salt
1 Tablespoon sugar
1 1/2 sticks cold unsalted butter, diced
1/2 cup ice water

Place the flour, salt and sugar in the bowl of a food processor fitted with the steel blade. Pulse for a few seconds. Add the butter and pulse 10-12 times, until the butter is in small pits the size of peas. With the motor running, pour the ice water into the feed tube and pulse just until the dough starts to hold together. Dump onto a floured board and knead quickly into a ball. Wrap in plastic and refrigerate for at least one hour.

Preheat the oven to 400 degrees. At this point you can either: grab a sheet pan and line it with parchment paper or a Silpat mat; or a round 11″ tart pan with a removable bottom.

Roll the dough out to 15 inches. If you’re using a sheet pan, you’ll want to use a ruler and knife and trim the edges. Place the dough on/in the pan of your choice and refrigerate while you prepare the apples.

Apple filling (a slightly modified version of Alice Water’s recipe through Smitten Kitchen)
6-8 apples (you can use Golden Delicious, Granny Smith, Gravenstein, or any other semi-tart apples)
5 Tablespoons granulated sugar
1 teaspoon ground cinnamon
3 Tablespoons unsalted butter (2 Tablespoons melted, 1 Tablespoon cold)

Peel the apples the cut them in half through the stem. Remove the stems and cores with a sharp knife and a melon baller. (Save the cores and peelings for the glaze). Slice by placing the halves cut side down. Place the entire sliced halves on the dough in a ring 2 inches from edge if going galette-style, or up to the sides if using the tart pan. Keeping the halves together helps when you lay them out. Then you can just lightly tilt them and they’ll fan out. Continue inward until you reach the center. Fold dough hanging over pan back onto itself; crimp edges at 1-inch intervals. Brush melted butter over apples and onto the edge of the dough. Sprinkle the apples with 3 Tablespoons of sugar, sprinkle the dough edges with 2 Tablespoons of sugar. Sprinkle 1 teaspoon cinnamon onto the apple filling and dot with 1 Tablespoon of butter.

Bake in center of oven until apples are soft, with browned edges, and crust has caramelized to a dark golden brown (about 45 minutes), making sure to rotate tart every 15 minutes.

Make the glaze: Put reserved peels and cores in a large saucepan, along with 1/2 cup of sugar. Pour in just enough water to cover; simmer for 25 minutes. Strain syrup through cheesecloth.

Remove tart from oven, and place onto a cooling rack. Let cool at least 15 minutes.

Brush glaze over tart, slice, and serve.

Eat a Peach Day

71513PC-139

Apparently there’s a designated national day for just about anything now, and today is National ‘Eat a Peach Day!’

During these late August days of summer, gardens in and around Portland look dry and desert-like with brightly colored fruit falling from yellowed, strained branches. We can’t possibly gorge ourselves on enough fresh fruit to make a dent, and since I don’t have the time to preserve by canning, I simply wash, slice, place on cookie sheets, freeze, and then package into sealed containers for longer term freezing. This way we can still enjoy some of those sweet fruits in smoothies or desserts into the cooler months.

What’s that you say? You’re looking for ways to enjoy peaches today? Glad you asked!

I’ve recently made a couple easy desserts using peaches that I’m excited to share with you.

First up is a super quick and easy peach cobbler…

PeachCobbler

71513PC-114

71513PC-171

Then there’s this yummy peach and blueberry galette…

81813PG-155

81813PG-101

81813PG-126

Of the two, the galette requires a bit more preparation, so if you’re into immediate gratification, or just limited on time, go with the cobbler. Served warm with a scoop of vanilla ice cream, both are delicious!

FRESH PEACH COBBLER
from Southern Living

Ingredients:
1/2 cup unsalted butter
1 cup all-purpose flour
1-2 cups sugar, divided
1 Tablespoon baking powder
Pinch of salt
1 cup milk
4 cups fresh peach slices
1 Tablespoon lemon juice
Ground cinnamon and/or nutmeg

Preparation:
• Melt butter in a 13 x 9-inch baking dish.
• Combine flour, 1 cup of the sugar, baking powder, and salt; add milk, stirring just until dry ingredients are moistened. Pour batter over butter (do not stir).
• Bring remaining 1 cup of sugar, peach slices, and lemon juice to a boil over high heat, stirring constantly; pour over batter (do not stir). Sprinkle with cinnamon and/or nutmeg, if desired.
• Bake at 375°F. for 40-45 minutes or until golden brown.
• Serve cobbler warm or reheat before serving.


PEACH AND BLUEBERRY GALETTE

Pate Brisee:
Ingredients:
2 1/2 cups all-purpose flour
1 teaspoon salt
1 teaspoon sugar
1 cup (2 sticks) cold unsalted butter, cut into small pieces
1/4 to 1/2 cup ice water

Preparation:
• Pulse flour, salt and sugar in a food processor to combine. Add butter; process until mixture resembles coarse meal, about 10 seconds. With the machine running, add ice water in a slow, steady stream through the feed tube until dough just holds together (no longer than 30 seconds).
• Shape dough into a disk. Wrap in plastic and refrigerate at least 1 hour (up to 2 days), or freeze for up to 1 month.

Filling:
Ingredients:
6-8 cups fresh fruit
1/4 to 1/3 cup sugar
1 Tablespoon freshly squeezed lemon juice
1 Tablespoon unsalted butter
1 large egg and 1 Tablespoon of heavy cream (for egg wash)

Preparation:
• Roll dough into a 16″ circle about 1/8″ thick. Transfer onto a baking sheet lined with parchment paper.
• In a small bowl combine 2/3 cup sugar and 1/4 cup flour. Sprinkle the sugar mixture onto the pastry to within 1 inch of the edges. In a large bowl, combine the fruit and 1/4 to 1/3 cup sugar; toss gently.
• Place fruit onto the pastry circle and sprinkle with lemon juice and dot with butter. Fold up pastry edges to form a lip.
• Beat 1 egg and add a tablespoon of cream. Brush the dough with the egg wash and sprinkle with sanding sugar.
• Place prepared galette into the refrigerator for about 15 minutes prior to baking.
• Preheat oven to 375°F.
• Bake until edges are golden brown and fruit is bubbling and cooked through, about 1 hour.
• Let cool on a wire rack for about 15 minutes, then transfer the galette to the rack to cool completely.

I scream, you scream…

72813IC3-107

…for bizarre flavored ice cream!

I’m not sure exactly when so many wacky ice cream flavors emerged as a trendy business model, but I first became aware of these when a friend gave me a copy of Jeni’s Splendid Ice Creams at Home. Some of Jeni’s flavors sound intriguing… Salty Caramel, Sweet Corn and Black Raspberry, Butter with Honey Hickory Pralines.

Others just sound wrong… Celery with Candied Ginger and Rum-Plumped Golden Raisins! Beet with Mascarpone Orange Zest and Poppy Seeds!

When the ice cream shop, Salt and Straw, turned up on Northwest 23rd Avenue in Portland, I joined many others in a long line for the taste experience. What sets them apart from your typical ice cream shop are their quirky, outside the box flavors that are made with local and organic ingredients. Flavors such as: Goat Cheese Marionberry Habanero, Raspberry Lemon Basil Sorbet, Pear with Bleu Cheese, and one they claimed is Oprah’s favorite, Arbequina Olive Oil. Once inside the small, retro-chic shop, customers wind through displays of vintage ice cream makers and supplies before arriving near the counter, where you are encouraged to sample before plunging into a full order. There really is no problem finding something incredible to suit your taste. Most of the flavors meld together much better than you’d expect.

Which brings me to this creamy, dreamy Strawberry/Basil delight I made a few weeks ago, but then I really couldn’t go wrong with these fabulous ingredients from my own garden… Oregon Hood strawberries, basil, and fresh eggs. You can regulate the basil flavor by soaking the leaves in the heated mixture more or less time. Personally, I loved the combination, but it won’t be everyone’s cup of tea.

73013SIC-100-Edit-2

72813IC4-105-Edit
72813IC3-142

Custom flavor creations are endless! Stick with a basic recipe, and add ingredients you like to create your own new favorites.

Strawberry Basil Ice Cream
This recipe is adapted from David Lebovitz’s formula for creating your own ice cream flavors.
Ingredients:
2 cups heavy cream
1 cup whole milk
3/4 cup granulated sugar
Table salt
1 cup tightly packed, coarsely torn basil leaves
5 large egg yolks
1 lb. fresh or frozen strawberries, trimmed
1/2 cup sugar
1-2 Tablespoons vodka (this was a suggestion from my friend Cathy at Wives with Knives) it keeps the fruit from becoming ice crystals in your otherwise creamy dessert.
Directions:
• In the bowl of a food processor, add washed, trimmed strawberries, 1/2 cup sugar and 1-2 Tablespoons vodka and puree and set aside.

• In a medium saucepan, mix 1 cup of the cream with the milk, sugar, and a pinch of salt. Warm the cream mixture over medium-high heat, stirring occasionally, until the sugar dissolves and tiny bubbles begin to form around the edge of the pan, 3 to 4 minutes.

• Stir in the basil leaves. Cover, remove from the heat, and let sit for 1 hour. Taste and let sit longer if you want a stronger basil flavor.

• Prepare an ice bath by filling a large bowl with several inches of ice water. Set a smaller metal bowl (one that holds at least 1-1/2 quarts) in the ice water. Pour the remaining cup of cream into the inner bowl (this helps the custard cool quicker when you pour it in later). Set a fine strainer on top. Whisk the egg yolks in a medium bowl.

• Rewarm the cream mixture over medium-high heat until tiny bubbles begin to form around the edge of the pan, 1 to 2 minutes. In a steady stream, pour half of the warm cream mixture into the egg yolks, whisking constantly to prevent the eggs from curdling.

• Pour the egg mixture back into the saucepan and cook over low heat, stirring constantly and scraping the bottom with a heatproof rubber spatula until the custard thickens slightly (it should be thick enough to coat the spatula and hold a line drawn through it with a finger), 4 to 8 minutes. An instant-read thermometer should read 175° to 180°F at this point. Don’t let the sauce overheat or boil, or it will curdle.  Immediately strain the custard into the cold cream in the ice bath. Press firmly on the basil leaves in the strainer with the spatula to extract as much flavor as possible.

• Cool the custard to below 70°F by stirring it over the ice bath. Stir the strawberry puree into the cooled custard.

NOTE: Refrigerate the custard until completely chilled, at least 4 hours. Then freeze the custard in your ice cream maker according to the manufacturer’s instructions. Transfer the just-churned ice cream to an air-tight container, and freeze for at least 4 hours or up to 2 weeks.

A few other flavors from my collection…

5413CS-111-Edit-EditExtra Dark Chocolate Sorbet

8611CI-116Cinnamon

70611IC-106Honey Lavender

Tell me… what’s your favorite ice cream flavor?