Sweet Hood Strawberries

Hood Strawberries

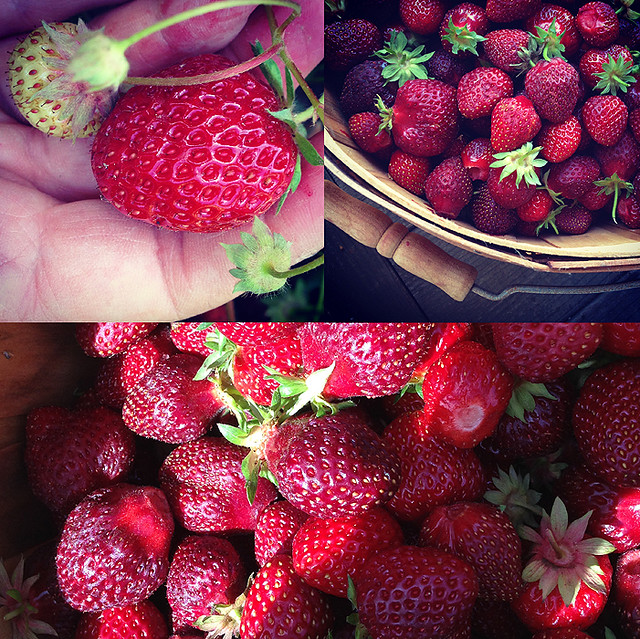
We have the best strawberries here in Oregon! Pretty sure we can attribute this to the climate… lots of rain, cool nights and warm sunny days. These are perfect conditions for growing the sweetest strawberries (the weeds in my yard seem to thrive in them as well). The berries stay on the vine and ripen slowly, allowing the sugars to surge before harvest. But these lovelies don’t last long after they’re harvested, which means you won’t see them in stores across the country. They’re very difficult to ship. I guess you’ll just have to visit Oregon to try them!

The window for Oregon strawberries (especially my favorite variety… Hoods), is so short. Sometimes I blink, and miss their quick visit. On a sunny afternoon last week, I coerced my teen into taking a drive out to a local farm with me. She had just finished high school exams for the year. I thought it might be a good way to bring her stress down a notch. An hour in the sun, talking and laughing, and before we knew it, our thoughts were lighter, and our buckets were full of these sweet red gems.

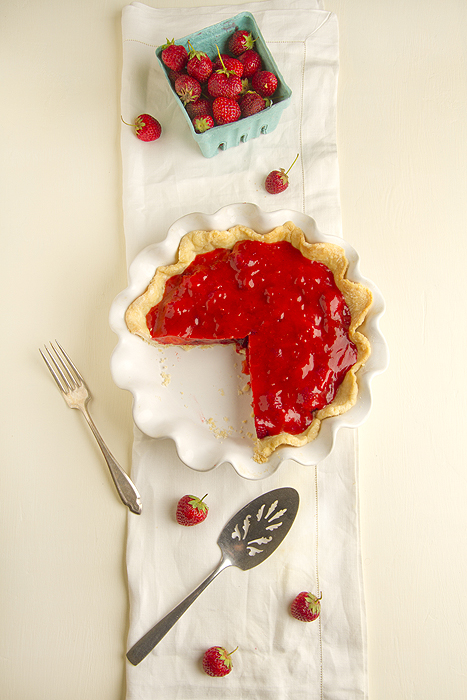
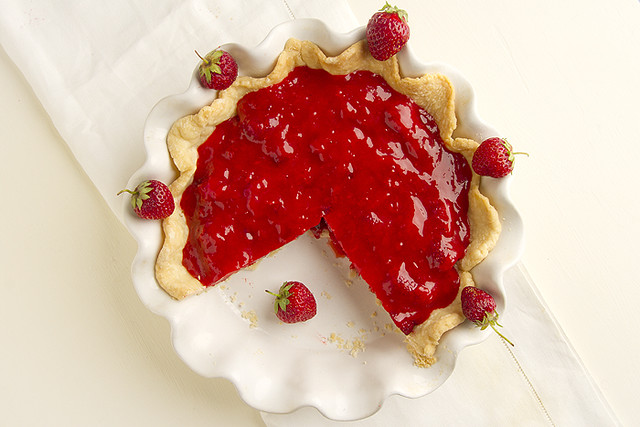
Then there was this pie…

61314SP3-107

61314SP4-108

This recipe is scribbled in a very overcrowded notebook with my other 15K or so favorites. It feels right to finally archive it here.

Strawberry Pie (recipe from my pie-baking Mother)

1 9-inch pre-baked pie crust (see detailed instructions below)
4 cups of fresh, sweet strawberries, hulled and washed immediately before use

Add about 3 cups of whole strawberries, (or however many will fit) in one layer on the bottom of the pre-baked pie crust.

In a small saucepan, bring to boil:
1 cup of crushed strawberries
3/4-1 cup granulated sugar
3 Tablespoons cornstarch
1/2 cup water

1. Boil the above ingredients for 2 minutes, or until the mixture has thickened. Add 1 Tablespoon butter. Mix and let cool.

2. Pour the glaze over the whole berries in the pie crust. Refrigerate for about 2 hours. Serve with whipped cream or ice cream.

Pie Crust (makes 1 9-inch crust)
1 cup flour
1/4 cup cold, unsalted butter, cut into small pieces
1/4 cup shortening
1/2 teaspoon salt
1 teaspoon sugar
1/8-1/4 cup ice cold water

1. Add the flour, salt and sugar to the bowl of a food processor and blend for a few seconds. Add unsalted butter pieces and pulse 4 times. Add shortening and pulse 4 more times. The mixture will look like coarse cornmeal and the butter and shortening bits no larger than peas. Add cold water and blend just until dough begins to stick together. Do not over blend.

2. Remove the dough and place it in a mound on a piece of plastic wrap. Flatten into a 4-inch disk, wrap and refrigerate for at least an hour before rolling out.

3. Sprinkle a little flour on a flat, clean work surface and on top of the disk of dough you intend to roll out. (My favorite rolling surface is a pastry cloth, but I also have a Silpat that works pretty well too). Using a rolling pin, apply light pressure while rolling outwards from the center of the dough. You have a big enough piece of dough when you place the pie dish over the dough and the dough extends by at least 2 inches all the way around.

4. When the dough has reached the right size, gently roll it onto the rolling pin. Place it into a pie plate, and simply unroll. Do not stretch the dough. Finish the edges by pressing against the edges with your finger tips or a fork.

To pre-bake the dough:

Once your crust is in the pie dish, freeze it for at least a half hour, until well chilled. This is an important step in pre-baking. Otherwise the crust will slip down the sides.
Preheat your oven to 350°F. line the chilled pie crust with parchment paper, wax paper, or aluminum foil. Fill at least two-thirds full with pie weights – dry beans, rice, or stainless-steel pie weights. Bake with weights for 20 minutes. Remove from oven, cool a few minutes and carefully remove pie weights. Poke small holes in the bottom of the pie crust with a fork and return to oven (without the weights) and cook for an additional 10 minutes, until the crust is golden brown. Cool completely before filling.

Bounty at last!

In early spring, after the threat of frost passes, I tuck small, young tomato plants into beds of organic, fertile soil. But the promise of bright red fruit is squelched somewhere in the course of summer. I pluck off the green balls and decorate my window sills with them. But not this year!

Unlike so many previous cool and rainy summers here in Portland, this summer consisted of the perfect combo of heat and moisture that helped create an amazing crop of beautiful red gems.

After roasting, adding to salads, slipping into sandwiches, we still have a tomato abundance. Time to sauce ‘em.

82713TS-107

My search for the perfect tomato sauce recipe led to many methods, ingredients, and a whole lot of opinions and inconsistencies. Gathering from a few tried and true practices, I decided to do some further experimenting on my own. I recalled a recipe that included wine and butter, so I knew those were two essential ingredients. You can’t go wrong with wine and butter, right?

82713TS-139

Many recipes use a plethora of fresh ingredients, and this was a plus for me, so I gathered a few favorites. This sauce turned out more orange than red. I thought this was from the carrots, but I’m pretty sure the culprit is the immersion blender. The blender adds air, which apparently alters the color. The color did not change the flavor, but if you want your sauce to be red, leave it a bit chunky, or mash it instead of blending.

82713TS-132

To make your life easier, I highly suggest using a food mill for this.

Here’s the recipe and method I used:

FRESH CREAMY TOMATO SAUCE
Yield: About 8 cups

24 medium-sized ripe tomatoes
1 stick unsalted butter
1 large onion, finely chopped
2 stocks of celery, chopped
2 carrots, chopped
3 cloves garlic, diced
1/2 cup white wine (American Sauvignon Blanc is a good one for cooking)
6-8 fresh basil leaves, coarsely chopped

Wash tomatoes and slice an X onto the top of each one (this will help the skins come off easily). Place tomatoes into a large pot and add enough water just to cover them. Cook covered for about 20 minutes, or until the tomato skins begin to peel away from the flesh.

Pour tomatoes (and all their delicious juices) into a food mill over a large bowl. In batches, mill the mix until you have a puree of tomatoey goodness.

In another large pan (a Dutch oven is a good choice), melt butter, add chopped onion, celery, carrots and garlic and cook for about 15 minutes over medium heat. Add white wine and chopped basil leaves and cook for 5 minutes more.

Add tomatoes that have been churned through the food mill to the veggie mixture, and simmer on low until the sauce has thickened, about 30-45 minutes. At this point, you can leave it chunky, or use an immersion blender, standing blender, or food processor to puree the sauce into a smooth, creamy consistency.

I poured about half of the sauce into sealed containers and placed them into the freezer. I then made spaghetti and meatballs with the other half, since that’s about the only way I can get my family to eat tomato sauce.

82713TS2-106

Eat a Peach Day

71513PC-139

Apparently there’s a designated national day for just about anything now, and today is National ‘Eat a Peach Day!’

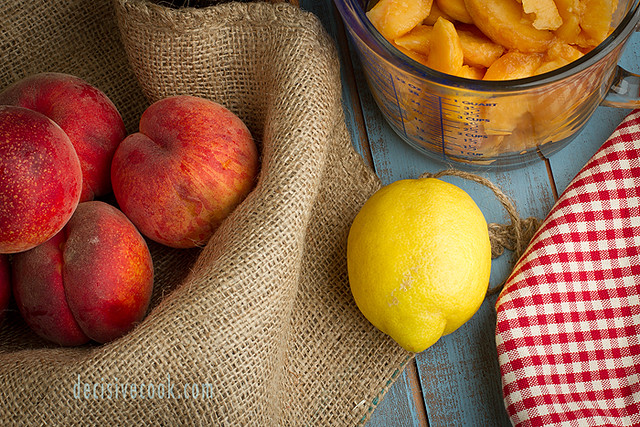
During these late August days of summer, gardens in and around Portland look dry and desert-like with brightly colored fruit falling from yellowed, strained branches. We can’t possibly gorge ourselves on enough fresh fruit to make a dent, and since I don’t have the time to preserve by canning, I simply wash, slice, place on cookie sheets, freeze, and then package into sealed containers for longer term freezing. This way we can still enjoy some of those sweet fruits in smoothies or desserts into the cooler months.

What’s that you say? You’re looking for ways to enjoy peaches today? Glad you asked!

I’ve recently made a couple easy desserts using peaches that I’m excited to share with you.

First up is a super quick and easy peach cobbler…

PeachCobbler

71513PC-114

71513PC-171

Then there’s this yummy peach and blueberry galette…

81813PG-155

81813PG-101

81813PG-126

Of the two, the galette requires a bit more preparation, so if you’re into immediate gratification, or just limited on time, go with the cobbler. Served warm with a scoop of vanilla ice cream, both are delicious!

FRESH PEACH COBBLER
from Southern Living

Ingredients:
1/2 cup unsalted butter
1 cup all-purpose flour
1-2 cups sugar, divided
1 Tablespoon baking powder
Pinch of salt
1 cup milk
4 cups fresh peach slices
1 Tablespoon lemon juice
Ground cinnamon and/or nutmeg

Preparation:
• Melt butter in a 13 x 9-inch baking dish.
• Combine flour, 1 cup of the sugar, baking powder, and salt; add milk, stirring just until dry ingredients are moistened. Pour batter over butter (do not stir).
• Bring remaining 1 cup of sugar, peach slices, and lemon juice to a boil over high heat, stirring constantly; pour over batter (do not stir). Sprinkle with cinnamon and/or nutmeg, if desired.
• Bake at 375°F. for 40-45 minutes or until golden brown.
• Serve cobbler warm or reheat before serving.


PEACH AND BLUEBERRY GALETTE

Pate Brisee:
Ingredients:
2 1/2 cups all-purpose flour
1 teaspoon salt
1 teaspoon sugar
1 cup (2 sticks) cold unsalted butter, cut into small pieces
1/4 to 1/2 cup ice water

Preparation:
• Pulse flour, salt and sugar in a food processor to combine. Add butter; process until mixture resembles coarse meal, about 10 seconds. With the machine running, add ice water in a slow, steady stream through the feed tube until dough just holds together (no longer than 30 seconds).
• Shape dough into a disk. Wrap in plastic and refrigerate at least 1 hour (up to 2 days), or freeze for up to 1 month.

Filling:
Ingredients:
6-8 cups fresh fruit
1/4 to 1/3 cup sugar
1 Tablespoon freshly squeezed lemon juice
1 Tablespoon unsalted butter
1 large egg and 1 Tablespoon of heavy cream (for egg wash)

Preparation:
• Roll dough into a 16″ circle about 1/8″ thick. Transfer onto a baking sheet lined with parchment paper.
• In a small bowl combine 2/3 cup sugar and 1/4 cup flour. Sprinkle the sugar mixture onto the pastry to within 1 inch of the edges. In a large bowl, combine the fruit and 1/4 to 1/3 cup sugar; toss gently.
• Place fruit onto the pastry circle and sprinkle with lemon juice and dot with butter. Fold up pastry edges to form a lip.
• Beat 1 egg and add a tablespoon of cream. Brush the dough with the egg wash and sprinkle with sanding sugar.
• Place prepared galette into the refrigerator for about 15 minutes prior to baking.
• Preheat oven to 375°F.
• Bake until edges are golden brown and fruit is bubbling and cooked through, about 1 hour.
• Let cool on a wire rack for about 15 minutes, then transfer the galette to the rack to cool completely.

I scream, you scream…

72813IC3-107

…for bizarre flavored ice cream!

I’m not sure exactly when so many wacky ice cream flavors emerged as a trendy business model, but I first became aware of these when a friend gave me a copy of Jeni’s Splendid Ice Creams at Home. Some of Jeni’s flavors sound intriguing… Salty Caramel, Sweet Corn and Black Raspberry, Butter with Honey Hickory Pralines.

Others just sound wrong… Celery with Candied Ginger and Rum-Plumped Golden Raisins! Beet with Mascarpone Orange Zest and Poppy Seeds!

When the ice cream shop, Salt and Straw, turned up on Northwest 23rd Avenue in Portland, I joined many others in a long line for the taste experience. What sets them apart from your typical ice cream shop are their quirky, outside the box flavors that are made with local and organic ingredients. Flavors such as: Goat Cheese Marionberry Habanero, Raspberry Lemon Basil Sorbet, Pear with Bleu Cheese, and one they claimed is Oprah’s favorite, Arbequina Olive Oil. Once inside the small, retro-chic shop, customers wind through displays of vintage ice cream makers and supplies before arriving near the counter, where you are encouraged to sample before plunging into a full order. There really is no problem finding something incredible to suit your taste. Most of the flavors meld together much better than you’d expect.

Which brings me to this creamy, dreamy Strawberry/Basil delight I made a few weeks ago, but then I really couldn’t go wrong with these fabulous ingredients from my own garden… Oregon Hood strawberries, basil, and fresh eggs. You can regulate the basil flavor by soaking the leaves in the heated mixture more or less time. Personally, I loved the combination, but it won’t be everyone’s cup of tea.

73013SIC-100-Edit-2

72813IC4-105-Edit
72813IC3-142

Custom flavor creations are endless! Stick with a basic recipe, and add ingredients you like to create your own new favorites.

Strawberry Basil Ice Cream
This recipe is adapted from David Lebovitz’s formula for creating your own ice cream flavors.
Ingredients:
2 cups heavy cream
1 cup whole milk
3/4 cup granulated sugar
Table salt
1 cup tightly packed, coarsely torn basil leaves
5 large egg yolks
1 lb. fresh or frozen strawberries, trimmed
1/2 cup sugar
1-2 Tablespoons vodka (this was a suggestion from my friend Cathy at Wives with Knives) it keeps the fruit from becoming ice crystals in your otherwise creamy dessert.
Directions:
• In the bowl of a food processor, add washed, trimmed strawberries, 1/2 cup sugar and 1-2 Tablespoons vodka and puree and set aside.

• In a medium saucepan, mix 1 cup of the cream with the milk, sugar, and a pinch of salt. Warm the cream mixture over medium-high heat, stirring occasionally, until the sugar dissolves and tiny bubbles begin to form around the edge of the pan, 3 to 4 minutes.

• Stir in the basil leaves. Cover, remove from the heat, and let sit for 1 hour. Taste and let sit longer if you want a stronger basil flavor.

• Prepare an ice bath by filling a large bowl with several inches of ice water. Set a smaller metal bowl (one that holds at least 1-1/2 quarts) in the ice water. Pour the remaining cup of cream into the inner bowl (this helps the custard cool quicker when you pour it in later). Set a fine strainer on top. Whisk the egg yolks in a medium bowl.

• Rewarm the cream mixture over medium-high heat until tiny bubbles begin to form around the edge of the pan, 1 to 2 minutes. In a steady stream, pour half of the warm cream mixture into the egg yolks, whisking constantly to prevent the eggs from curdling.

• Pour the egg mixture back into the saucepan and cook over low heat, stirring constantly and scraping the bottom with a heatproof rubber spatula until the custard thickens slightly (it should be thick enough to coat the spatula and hold a line drawn through it with a finger), 4 to 8 minutes. An instant-read thermometer should read 175° to 180°F at this point. Don’t let the sauce overheat or boil, or it will curdle.  Immediately strain the custard into the cold cream in the ice bath. Press firmly on the basil leaves in the strainer with the spatula to extract as much flavor as possible.

• Cool the custard to below 70°F by stirring it over the ice bath. Stir the strawberry puree into the cooled custard.

NOTE: Refrigerate the custard until completely chilled, at least 4 hours. Then freeze the custard in your ice cream maker according to the manufacturer’s instructions. Transfer the just-churned ice cream to an air-tight container, and freeze for at least 4 hours or up to 2 weeks.

A few other flavors from my collection…

5413CS-111-Edit-EditExtra Dark Chocolate Sorbet

8611CI-116Cinnamon

70611IC-106Honey Lavender

Tell me… what’s your favorite ice cream flavor?